Introducing Warka
In December 2023, I went to the 37c3 in Hamburg, Germany. The event was huge. Lots of people, lots of talks, and lots of stands where people gathered to tinker with electronic gadgets.
While wandering around and hopping from a stand to another, it made me realize how much electronics, programming and art when mixed together are very fun.
I was a complete noob in electronics, so when I got back home, I joined r/esp32. The reddit community is very active and I learned a lot from people sharing the details of their projects.
One of the impressive projects I’ve found in r/esp32 was the E-Paper Weather Display. That project was enough to convince me to start the journey. I now wanted to build and customise my own e-paper display.
I jumped into AliExpress and bought a few components: some ESP32s, an E-INK display, a few sensors and cables.
I started to play with the E-INK display and it felt like magic. I wanted to understand how the pixels are drawn on the e-ink paper. While wrangling with E-Paper Weather Display code, I found out that the pictures were actually hardcoded as a bitmap in some C++ header files.
For example, a 16x16 pixels house icon was defined as follows:
const unsigned char house_16x16[] PROGMEM = {
  0xff, 0xff, 0xff, 0xff, 0xff, 0xff, 0xfc, 0x2f, 0xf9, 0x8f, 0xf3, 0xcf,
  0xe7, 0xe7, 0xcf, 0xf3, 0xcf, 0xf3, 0xef, 0xf7, 0xef, 0xf7, 0xef, 0xf7,
  0xef, 0xf7, 0xf0, 0x0f, 0xff, 0xff, 0xff, 0xff
};
This array is then stored in the flash memory (SRAM) and drawn on the display using a drawBitmap function available in the Adafruit_GFX library.
Here is what the house icon looks like when drawn on the e-ink display (scaled up for better visibility):

Drawing text was also tedious (cf. drawMultiLnString). You have to make sure to compute the coordinates of a bounding box for the text and then draw the text in that bounding box. If your text is too long, you have to split it into multiple lines and draw each line separately.
That felt overly complex and odd to me. It’s basically doing low-level frontend development in C++. That’s fun but inconvenient.
I wanted to be able to draw my own pictures dynamically and iterate very fast. That’s when I got the idea for Warka.
What is Warka?
Warka is a framework for building e-ink displays using React as a frontend and Python as a backend.
An ESP32, running a ~100 C++ lines lightweight software, is used to fetch a screenshot file from the backend server and display it in the e-ink display.
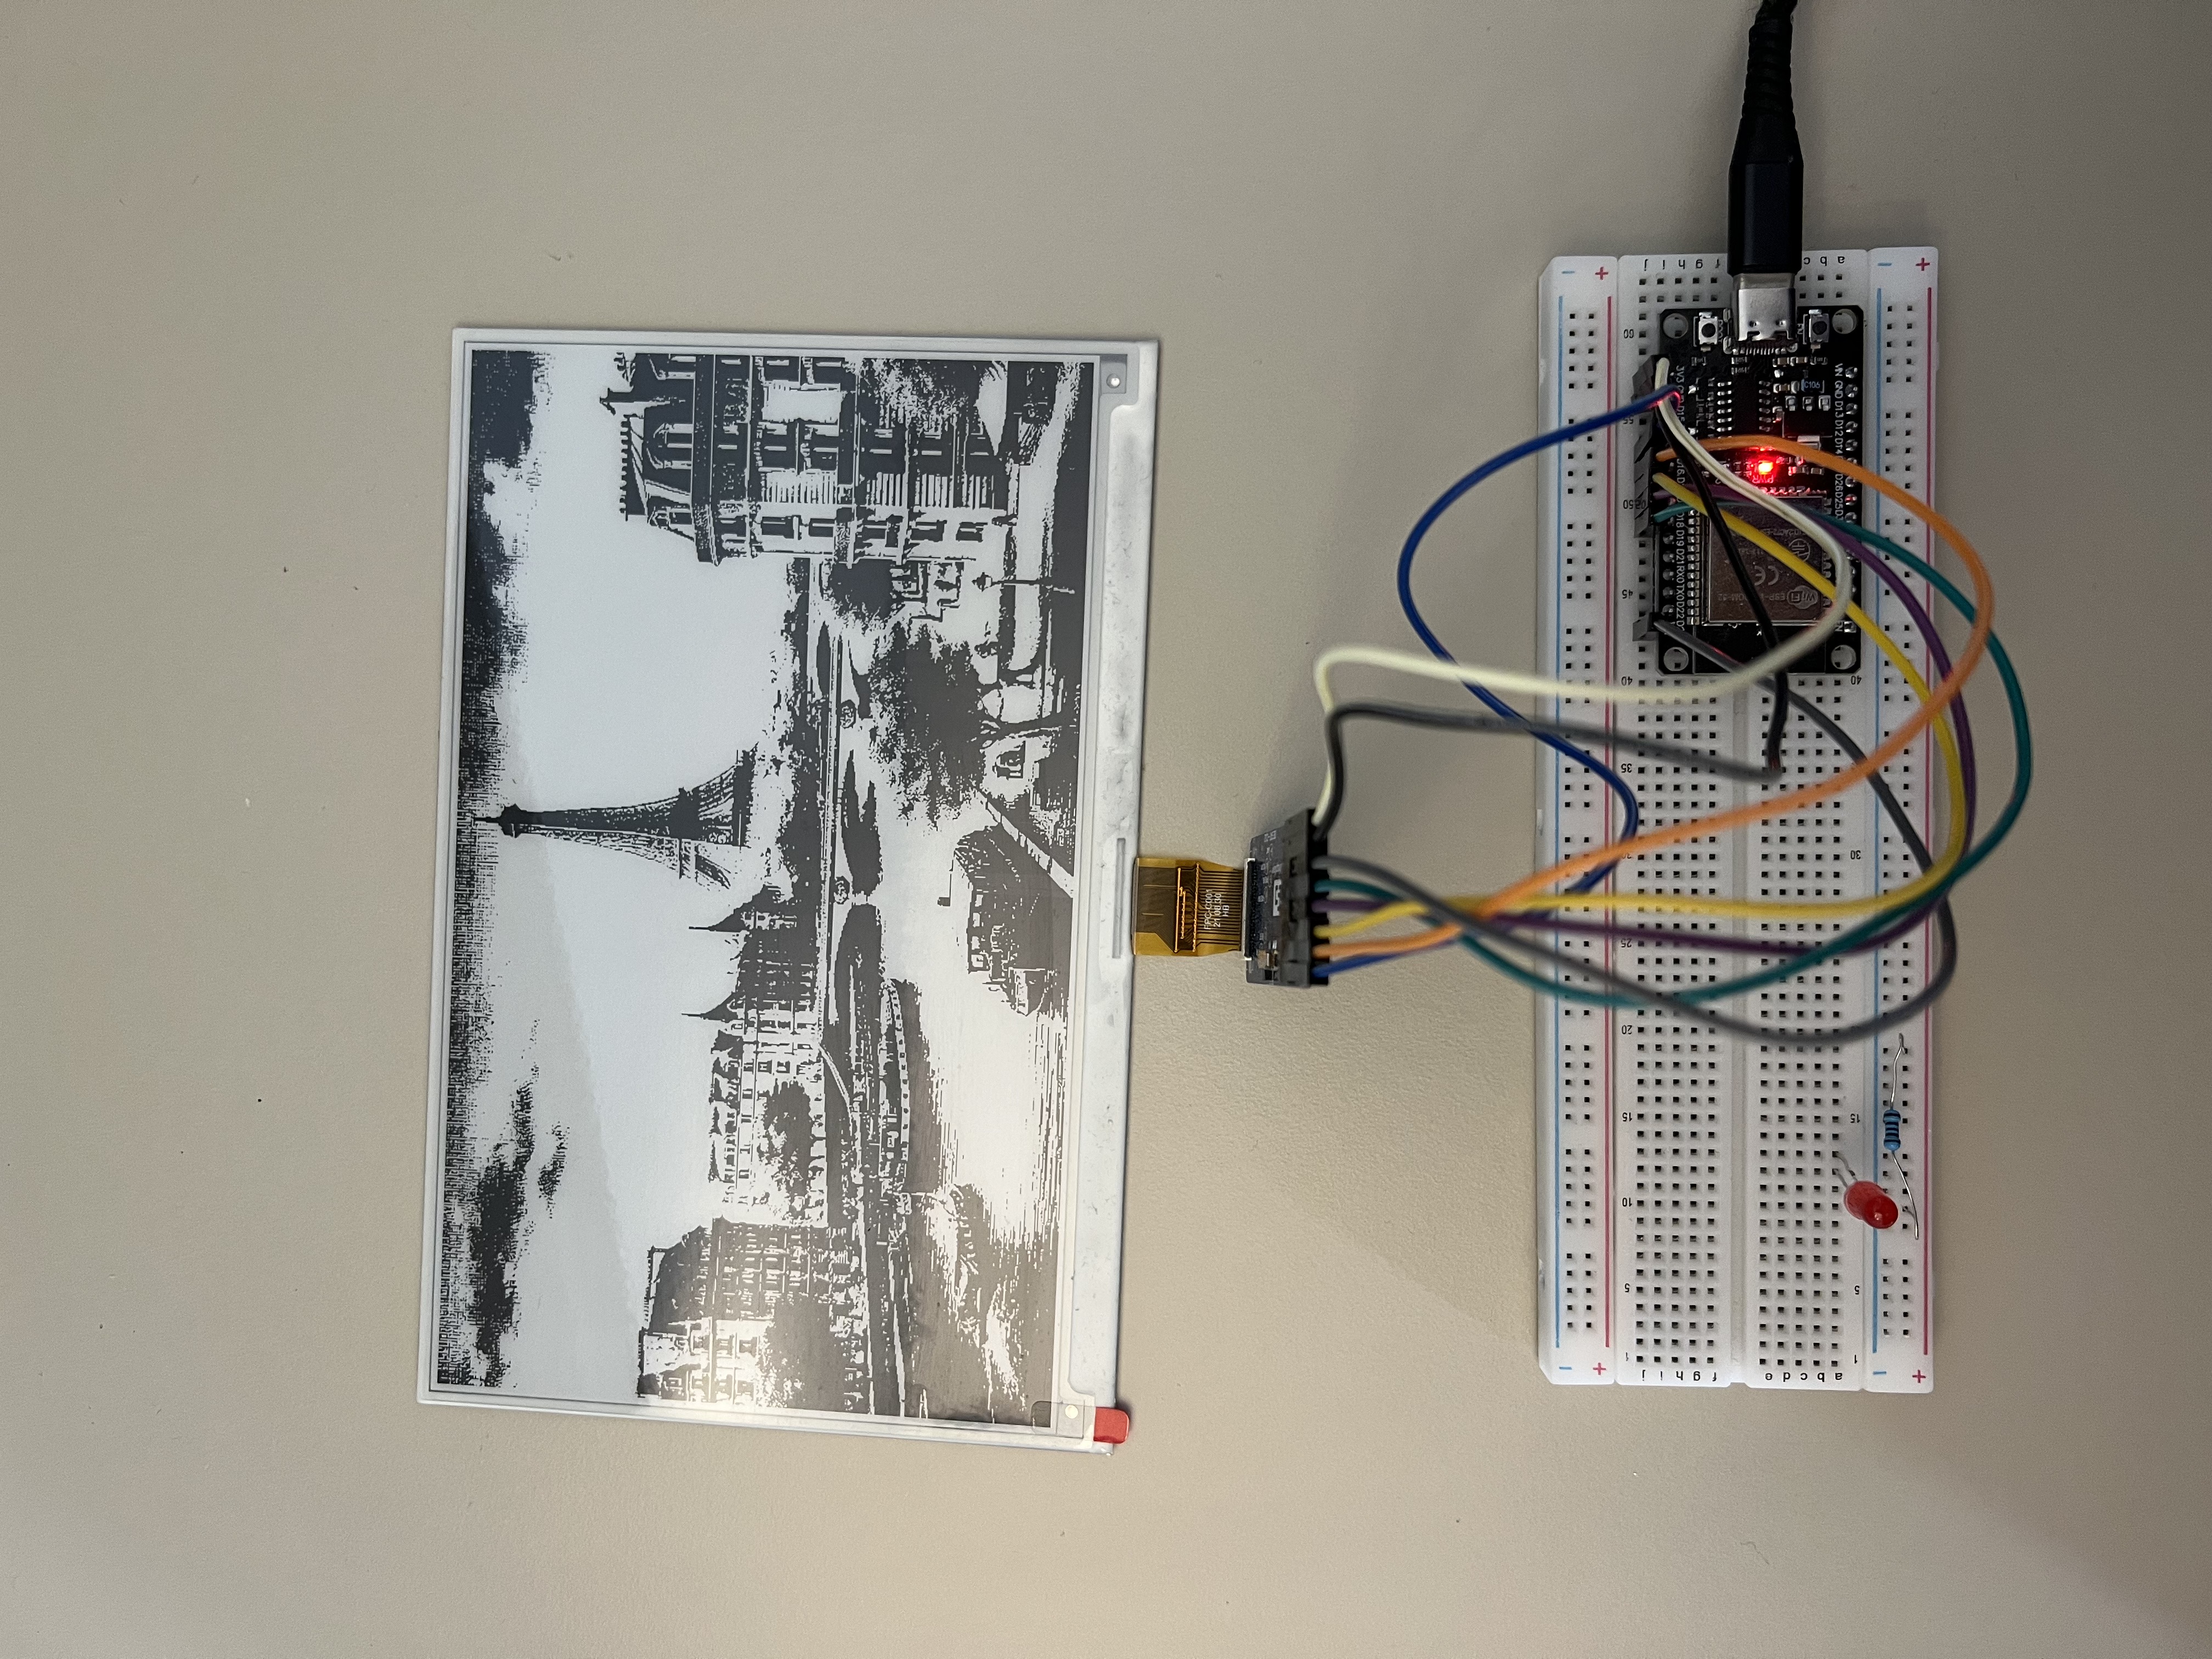
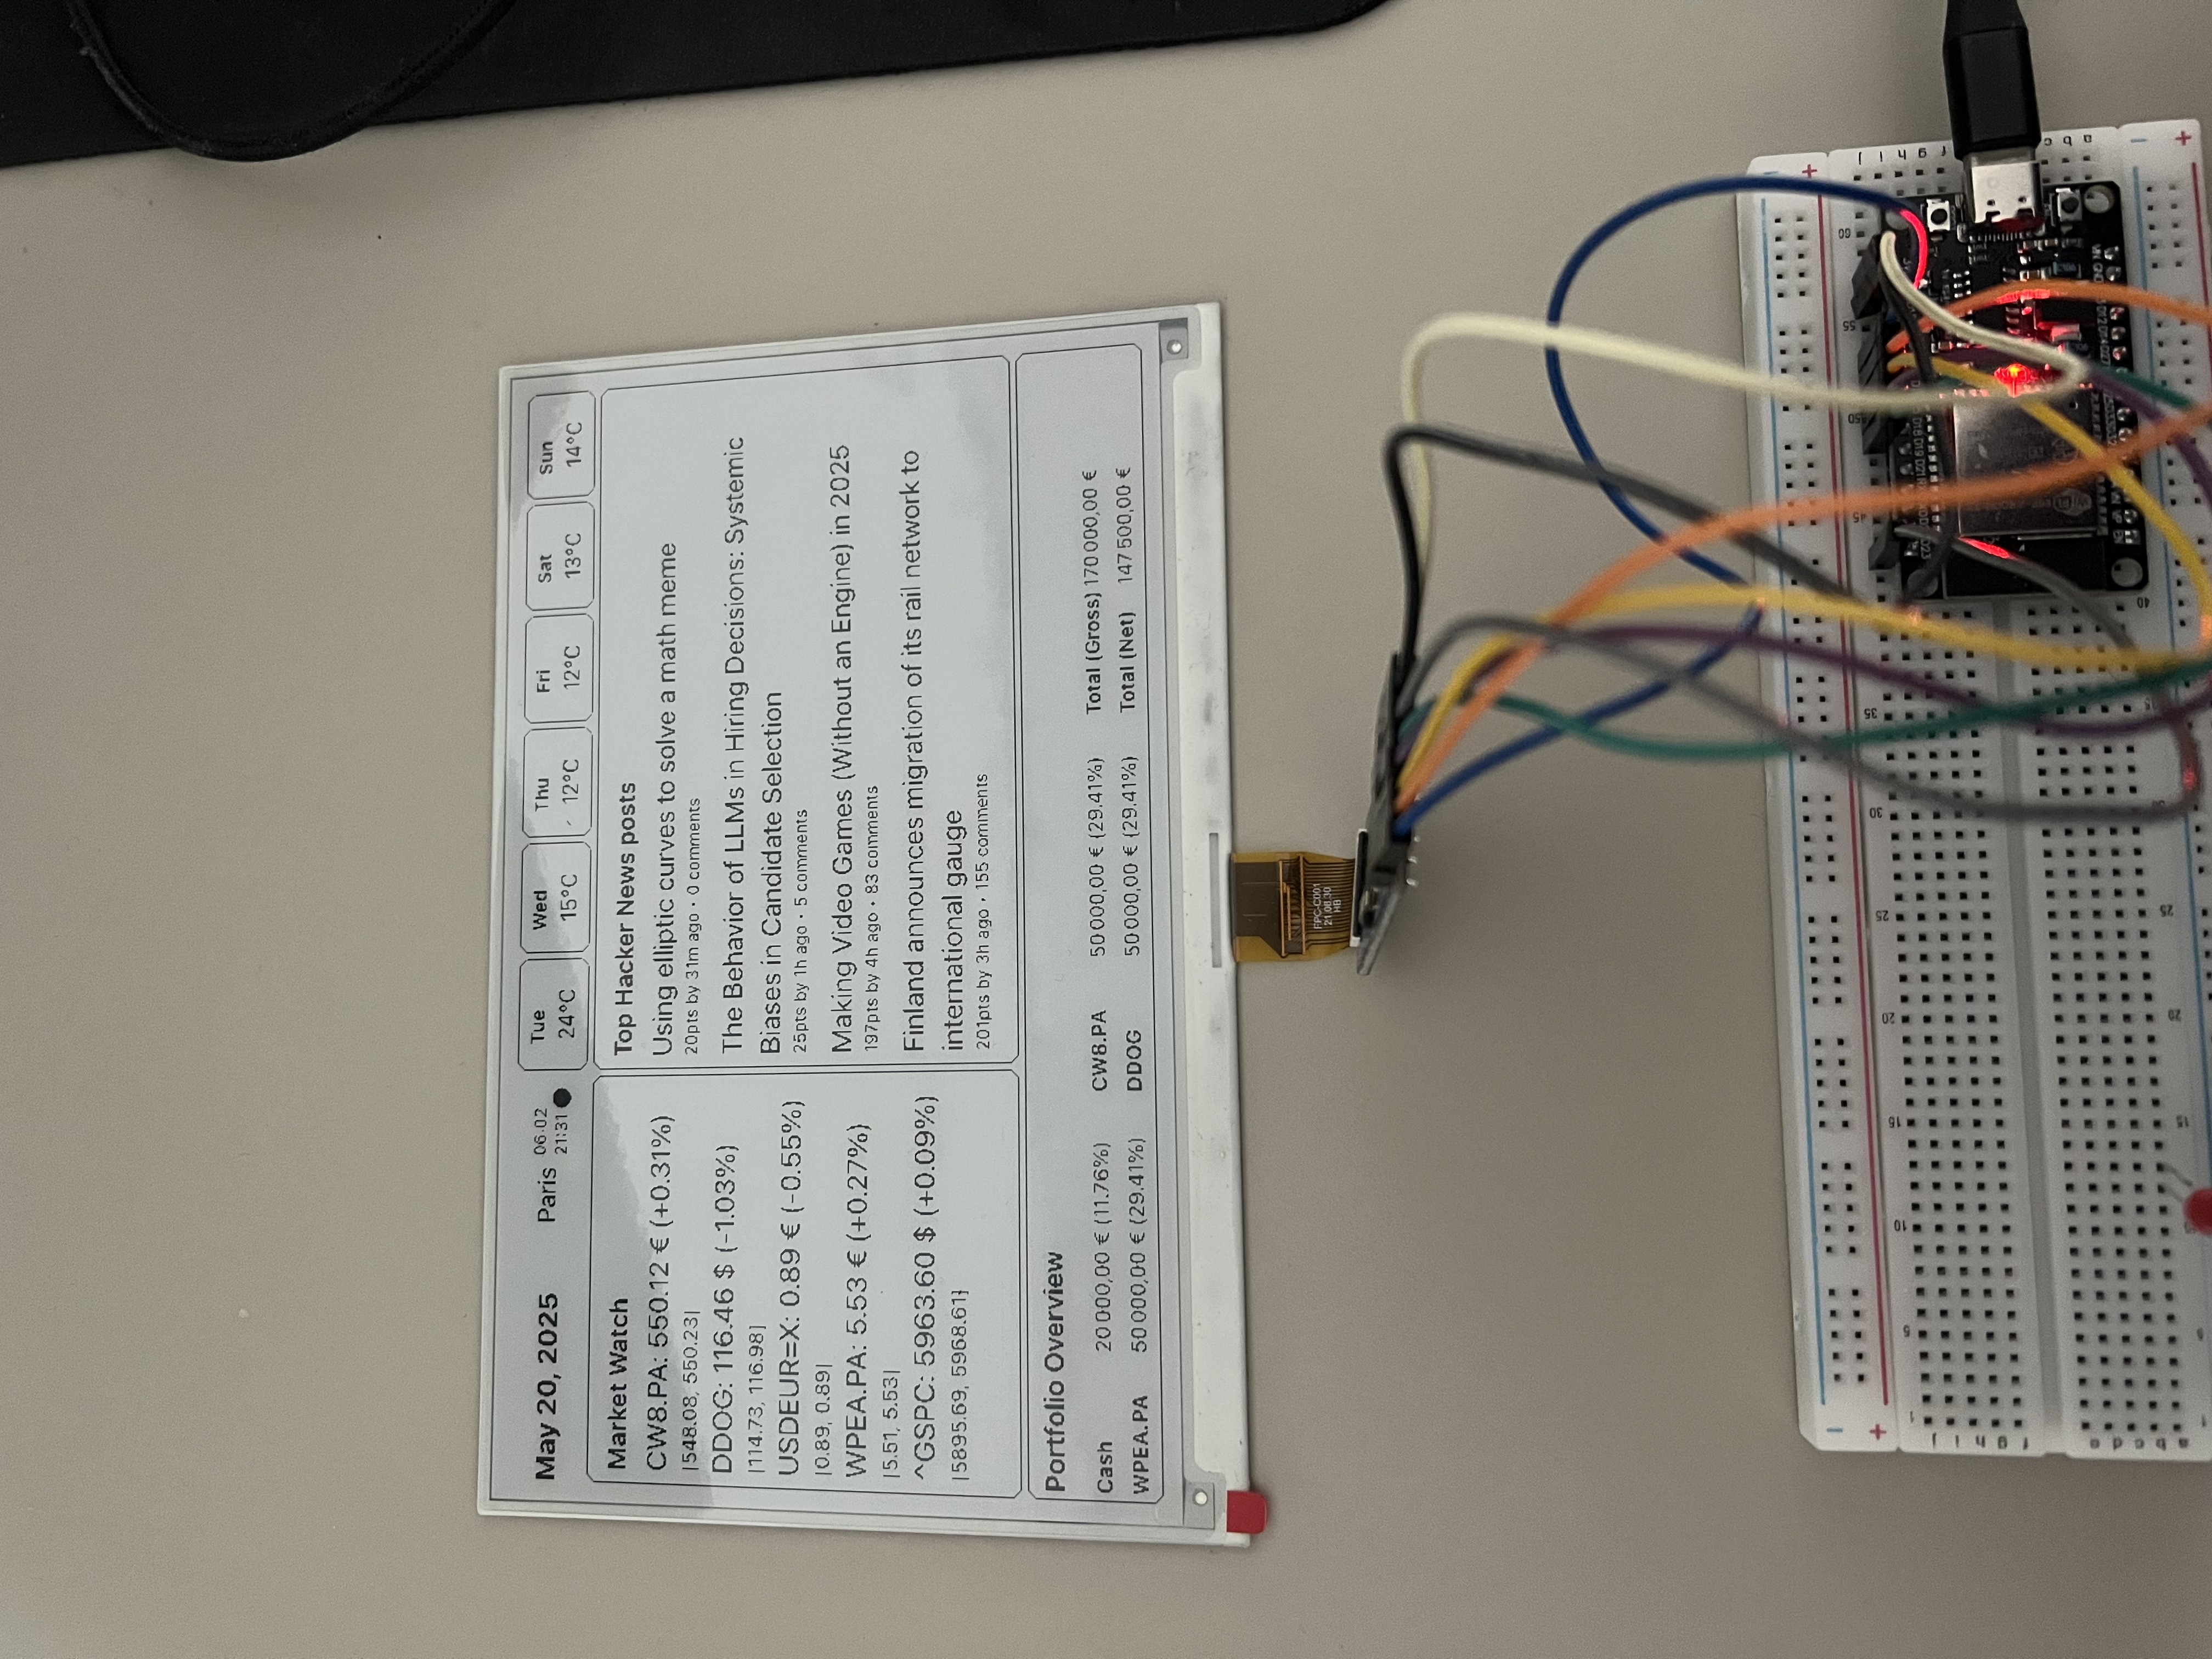
In practice, here is what it looks like:
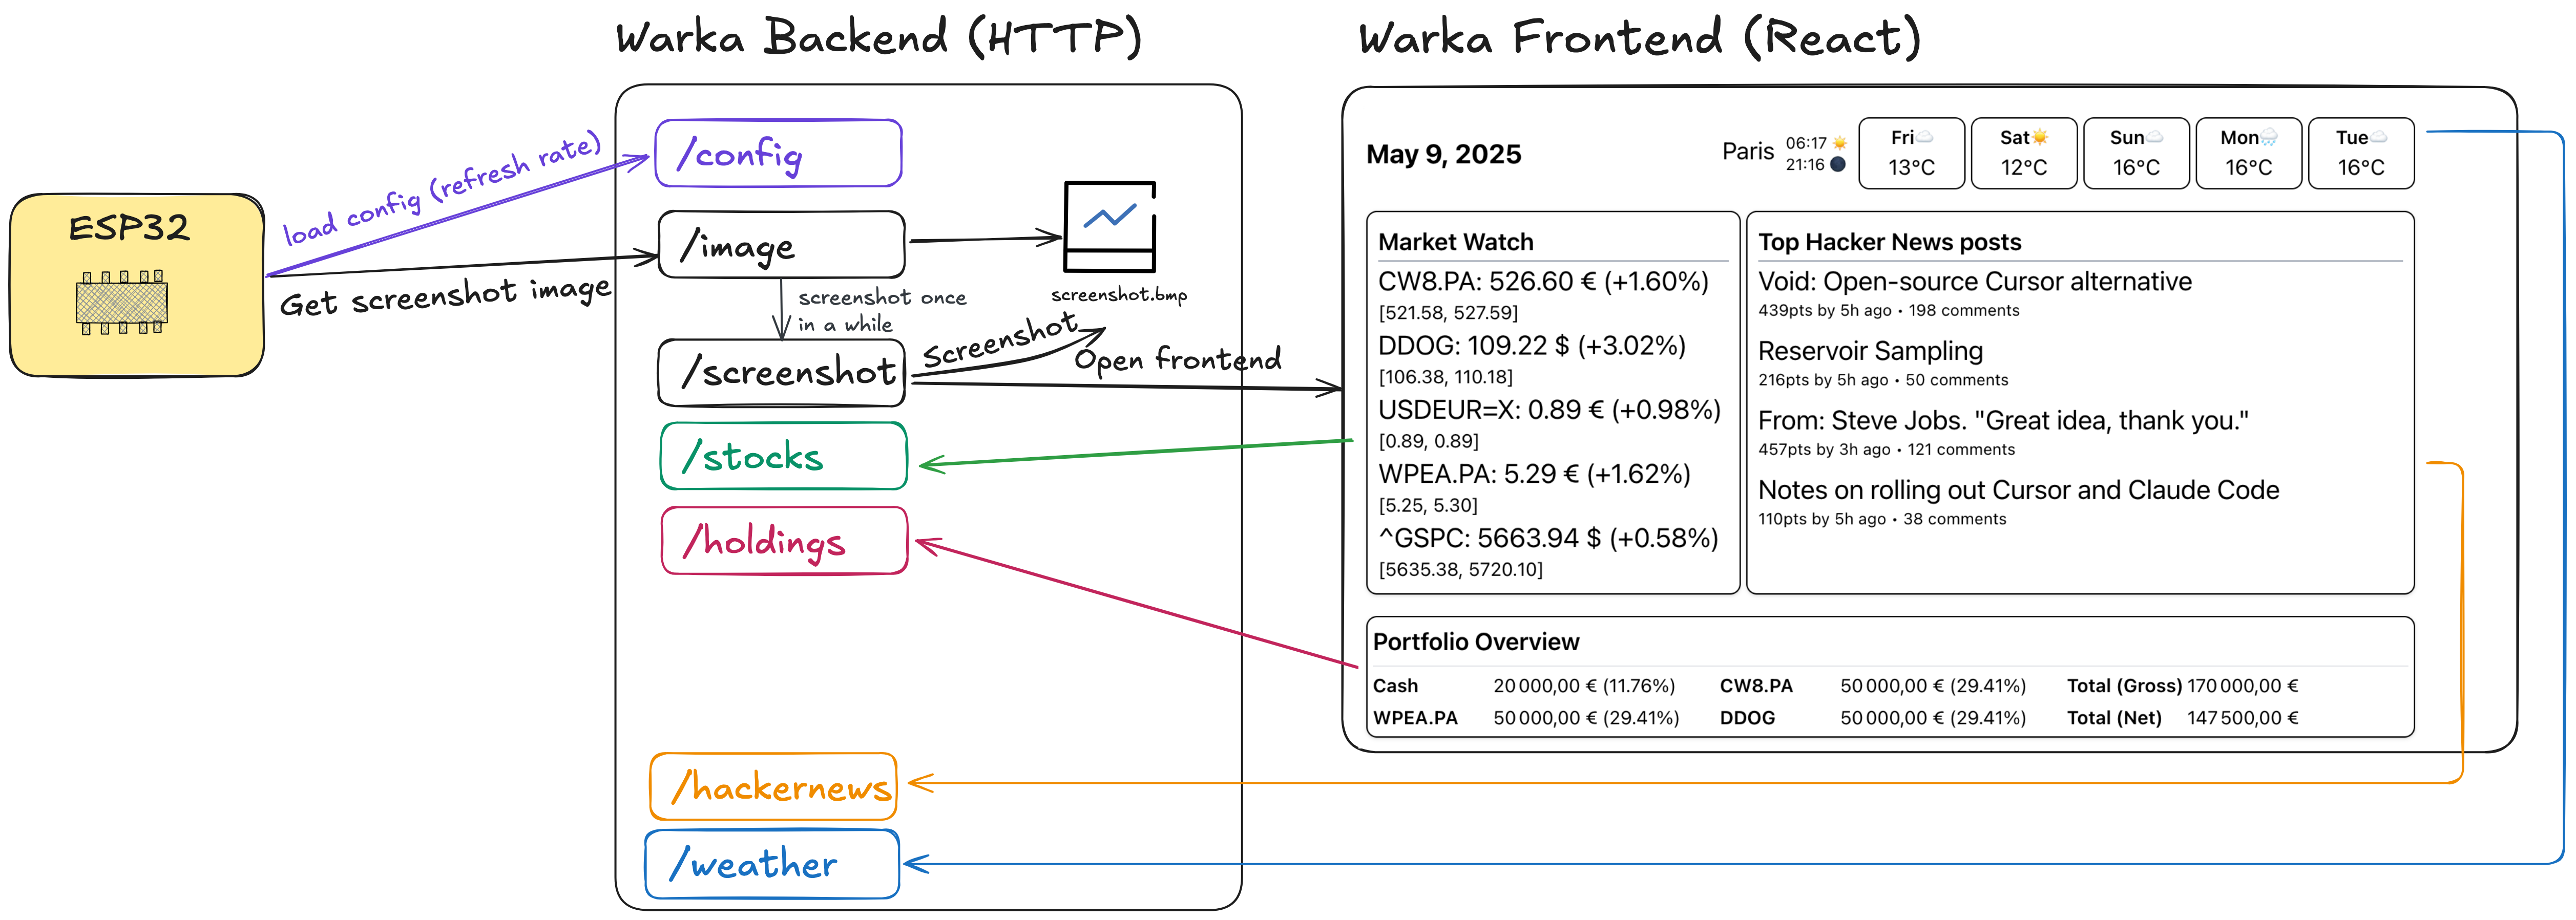
Warka has 3 components:
- Frontend that is displayed in the e-ink paper, coded in React
- Backend server, coded in Python (Flask) that:
- Serves the endpoints used by the frontend
- Screenshots the frontend and stores it in a bmp file to be retrieved by the ESP32
- Serves a config file to the ESP32 (to dynamically control screen refresh rate, etc.)
- An ESP32 that fetches the bmp screenshot file from the backend server and displays it in the e-paper, coded in C++.
With this architecture, you can now iterate super fast on your display and draw anything really quickly.
No need to hardcode your icons in C++ anymore. No need to worry about the size of your text.
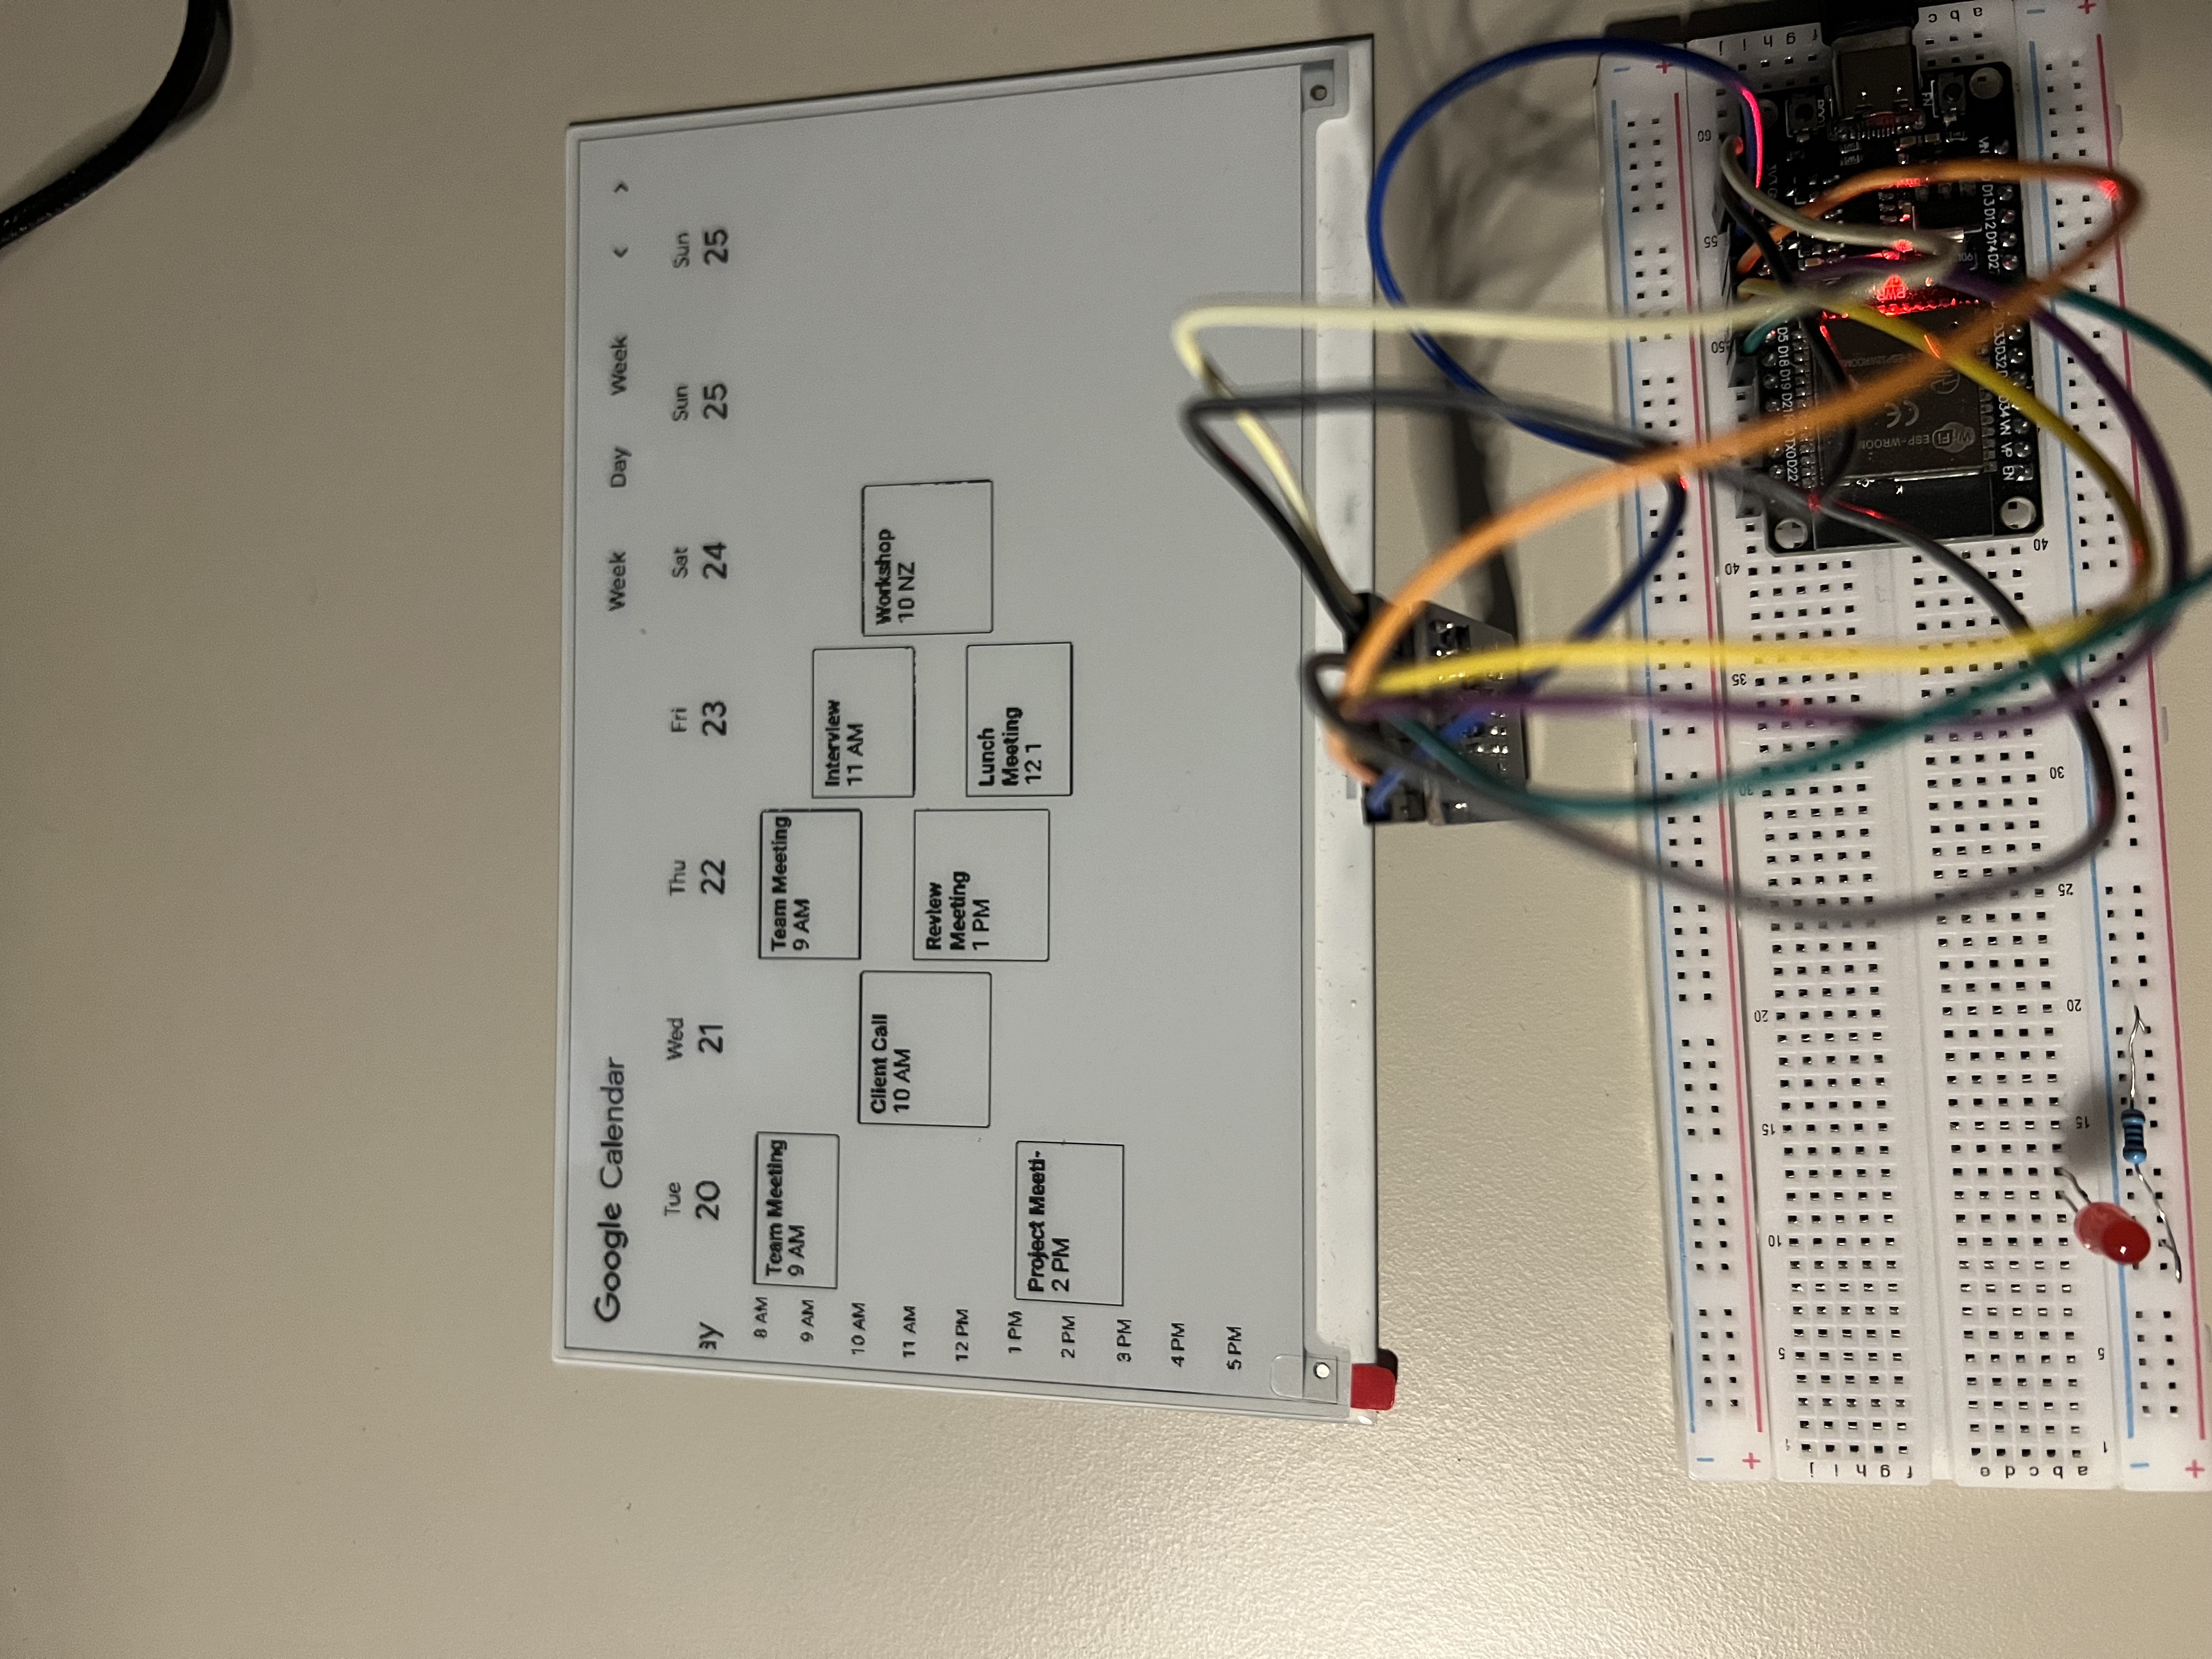
The design burden is now on the frontend (React) side. You can implement a calendar, a news feed, a dynamic weather display, a screensaver.
If you’re curious about how everything is glued out together, you can check the code in Github.
Hardware
The hardware is very simple. You need:
- ESP32: I used this one
- E-INK display: I used the GooDisplay 7.5 inch
- E-INK adapter: I used the GooDisplay adapter
- power supply: I used my laptop as a power supply but you can also use a power bank or a 5V power supply
- a few jumper wires to connect the ESP32 to the E-INK display
Wiring
Here is how to wire the ESP32 to the E-INK display:
| ESP32 Pin | E-INK Pin |
|---|---|
| GND | GND |
| 3.3V | 3.3V (VCC) |
| GPIO D4 | Busy |
| GPIO D16 | RES |
| GPIO D17 | D/C |
| GPIO D5 | CS |
| GPIO D18 | SCK |
| GPIO D23 | SDI |
Software
I hosted both Warka’s backend and frontend on my laptop but for a production ready setup, you can host them on a remote server.
Refer to the config.h header file to configure the WiFi credentials and the backend server address.
Set the WiFi credentials to connect to your local network.
Change the BASE_URL to point to your backend server.
const char BASE_URL[] = "http://192.168.1.79:8000/"; // change this with your server address
Warka - Dashboard
This is the main dashboard of Warka. It displays the date, the weather forecast, the stock market, the current top hacker news posts and an overview of my portfolio.
For the sake of the demo, I used random data to fill the portfolio overview.
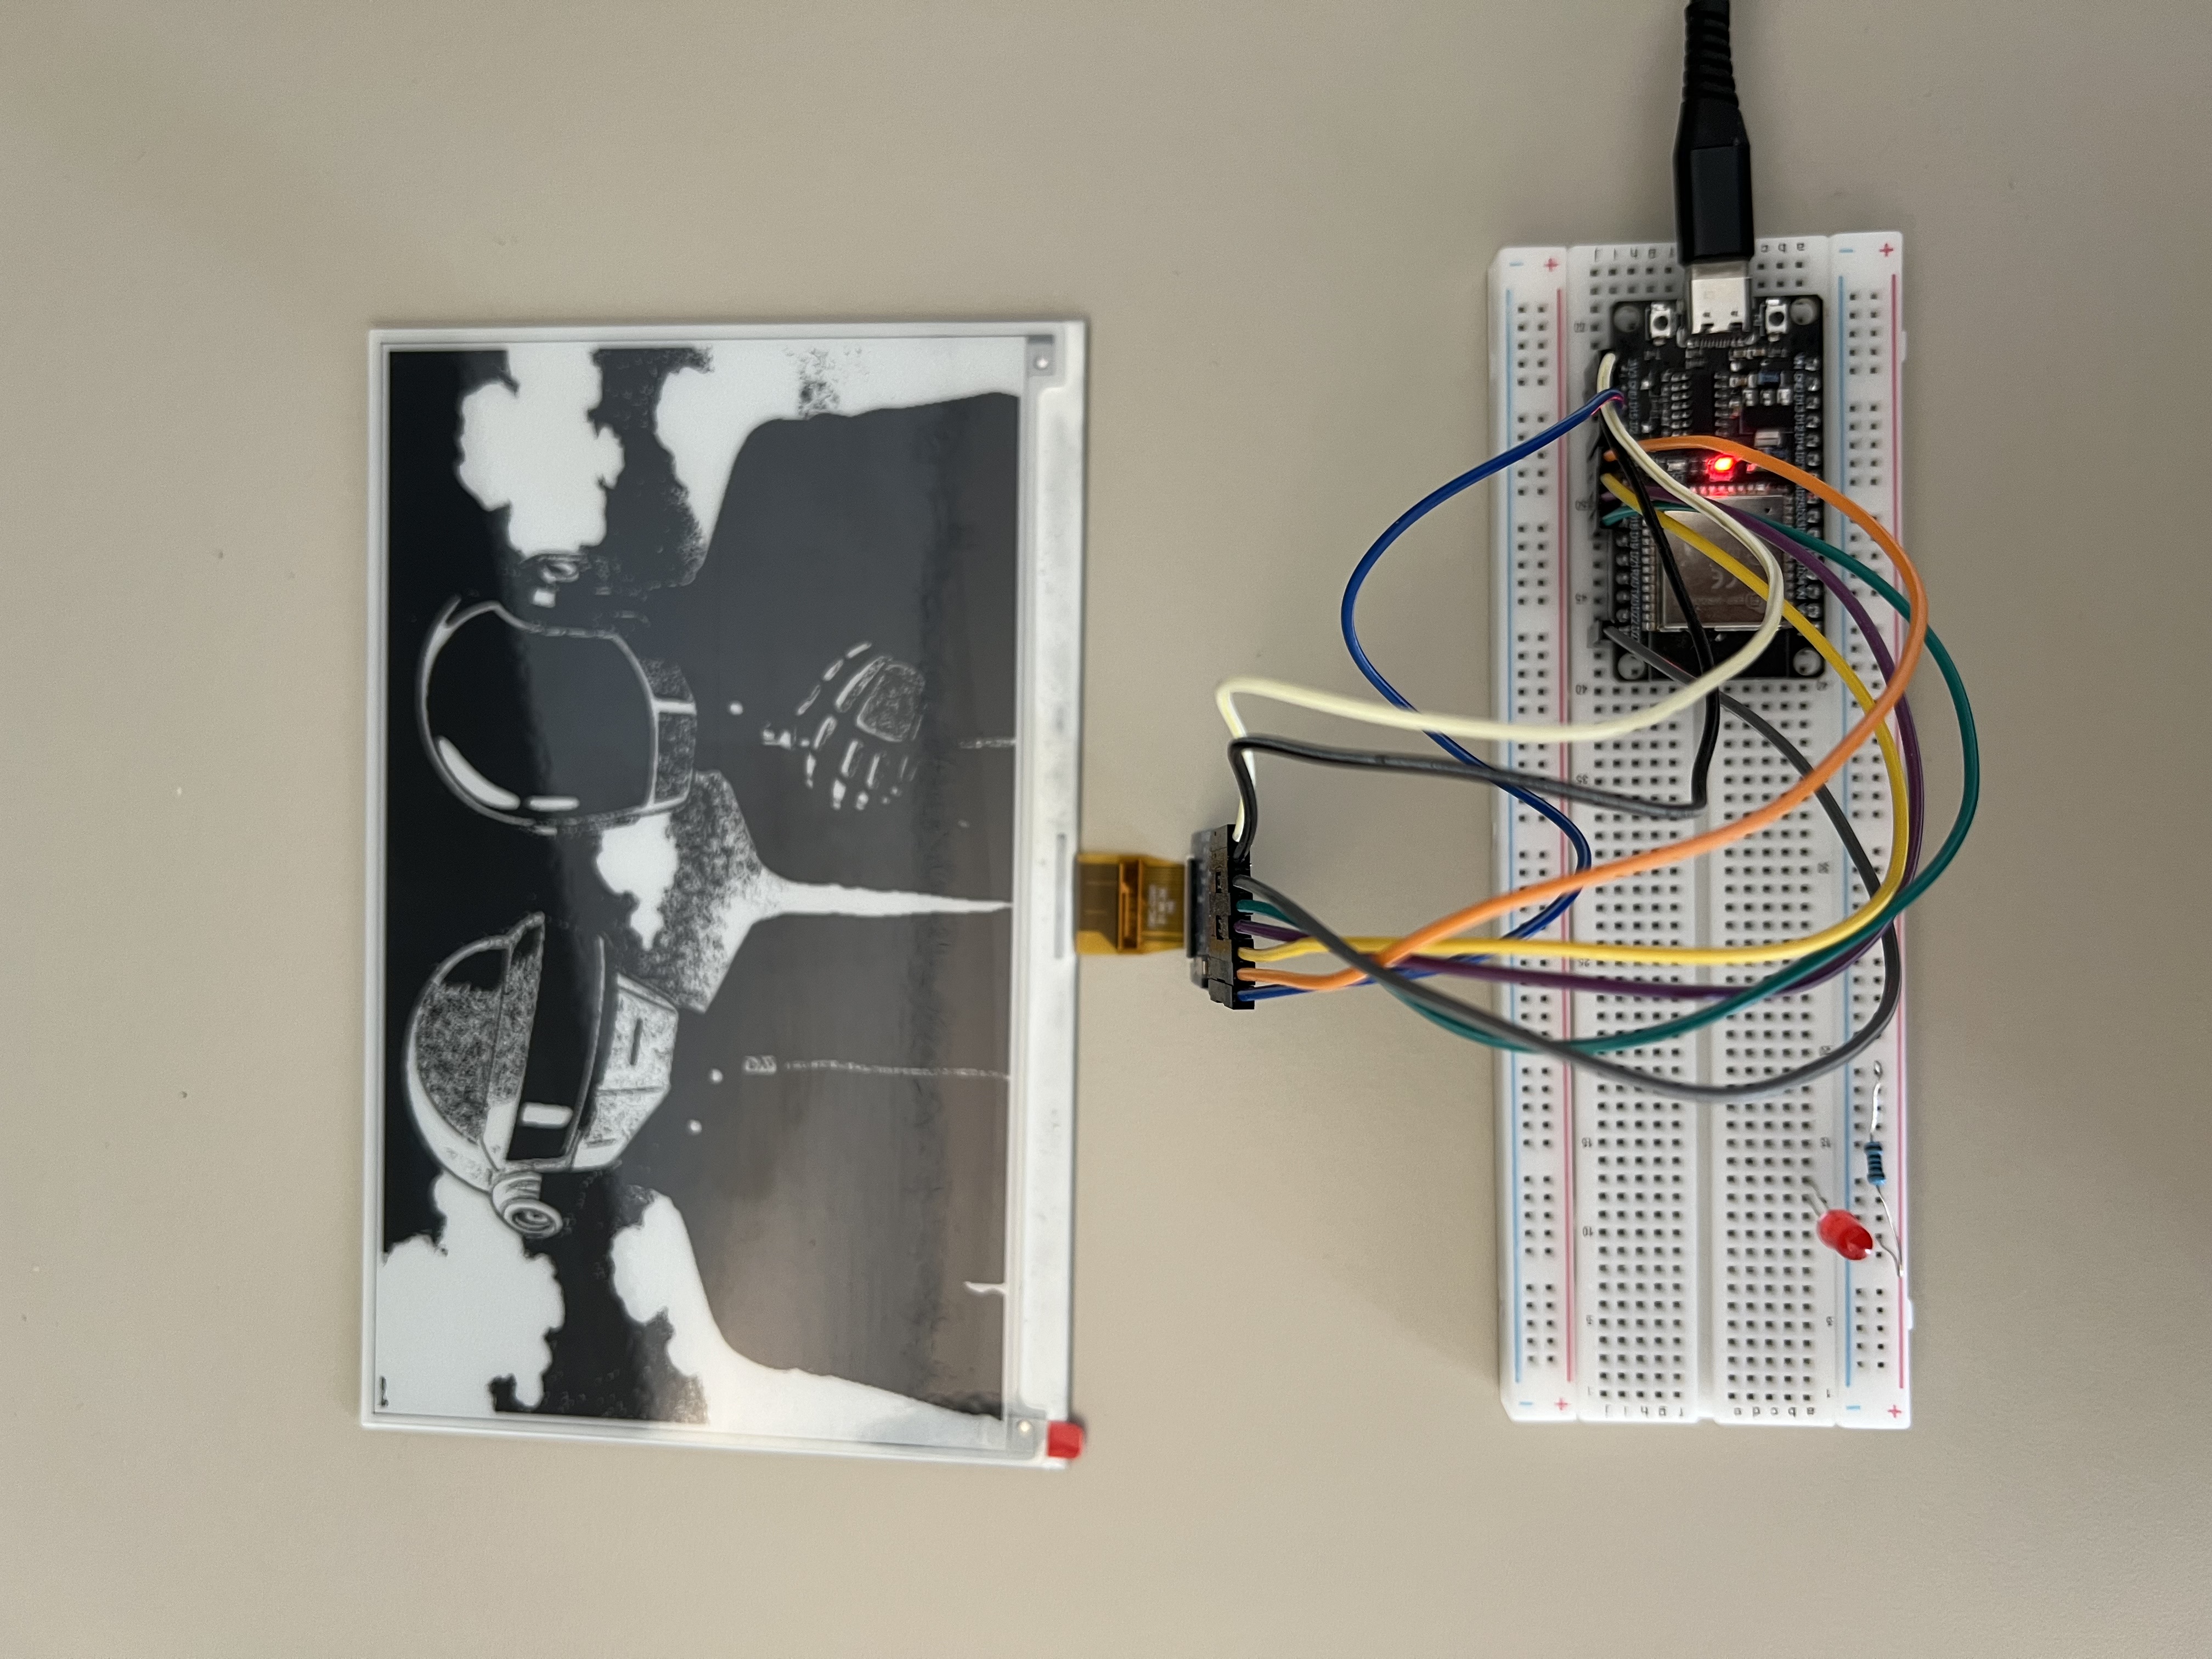
Warka - Daft Punk refresh
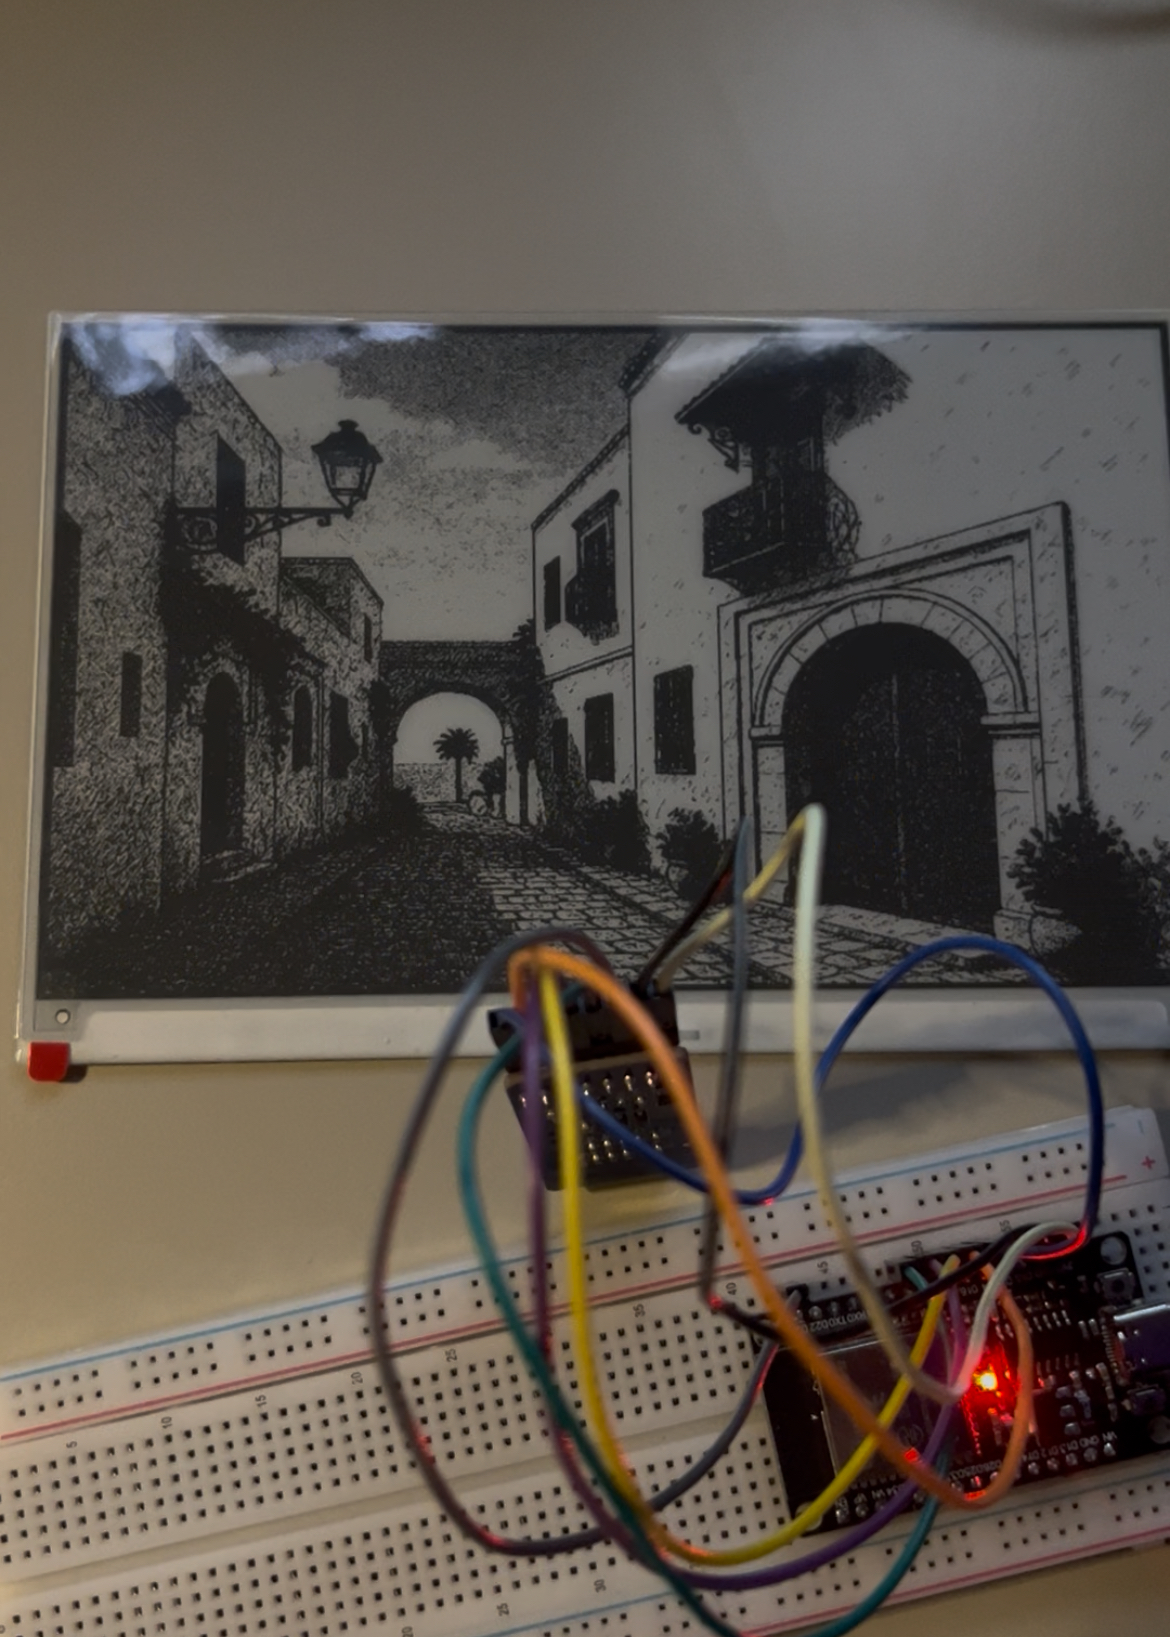
Warka - Screensavers